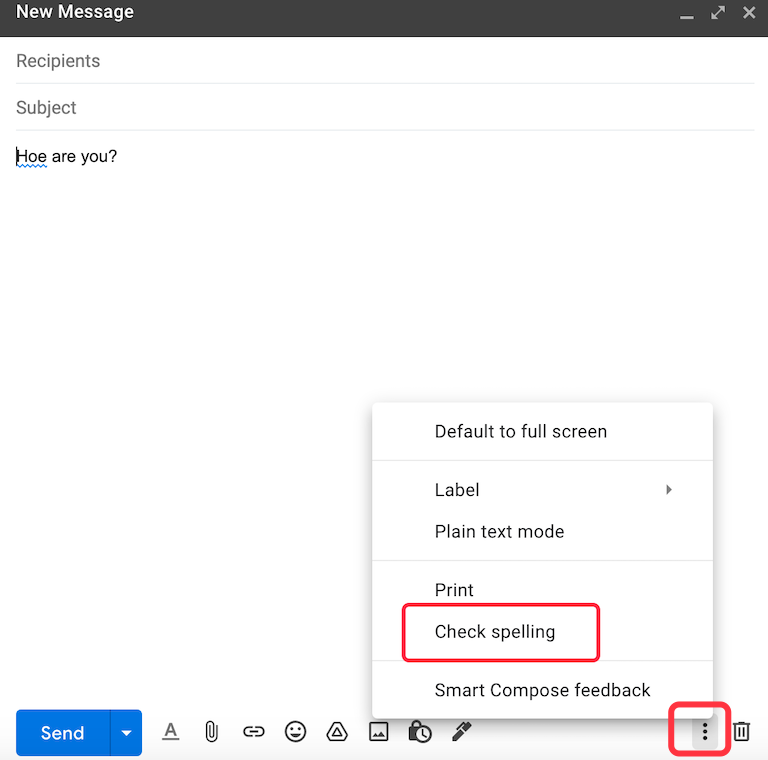
To check your spelling, navigate to the more icon at the bottom right of your email composer and click Check spelling
Step-by-step Instructions
When writing email content, we may encounter spelling errors or grammatical issues that make the content difficult to understand or incorrect. This makes us appear unprofessional and formal. Activating spell check can help us more effectively check the content of the email and improve communication efficiency.
1. Click on the ‘More’ icon.
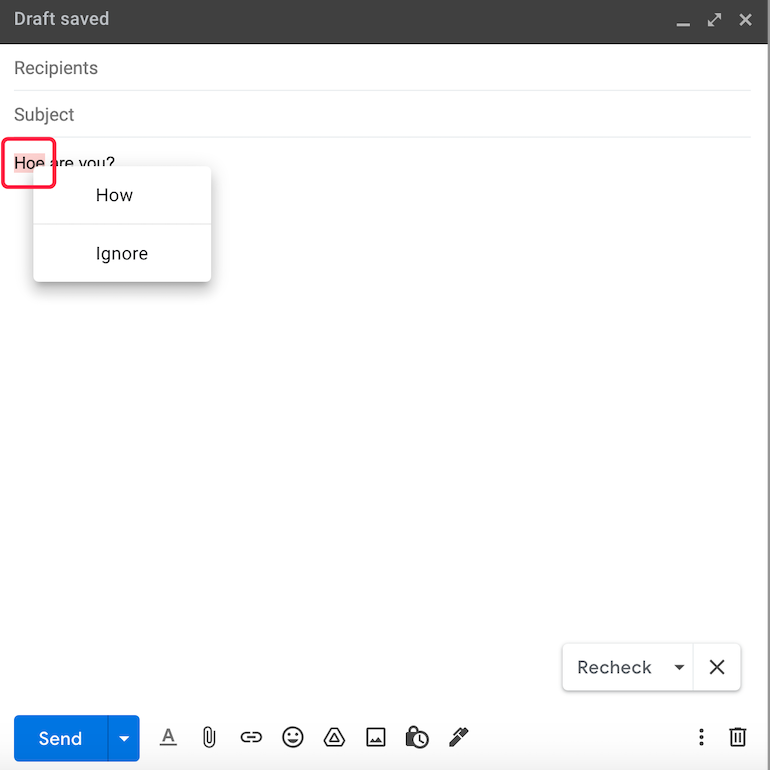
2. From the drop-down menu that appears, click on the ‘Check Spelling’ option. This will initiate the spelling checker in Gmail and highlight any words that are misspelled or have grammatical errors.
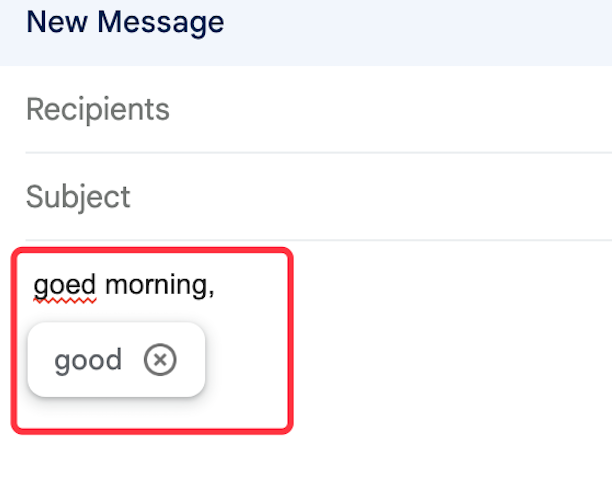
3. Click on the color box located next to the misspelled word. This will bring up a list of suggestions for correcting the spelling of the word. You can choose the correct spelling from the list or type in your own correction.
Why is it necessary to check the spelling before sending an email?
It’s important to check your spelling before sending emails, as mistakes can give off the impression that you are careless or not paying attention to detail. With the spelling checker in Gmail, you can easily catch any mistakes before sending your emails, giving you the confidence to communicate clearly and effectively with your contacts.
Demo Video (Check Spelling)
Other Tips You May be Interested:
Confidential mode
Once you’ve composed your email, click the clock icon at the bottom right-hand corner of the message, and then set an expiry date.