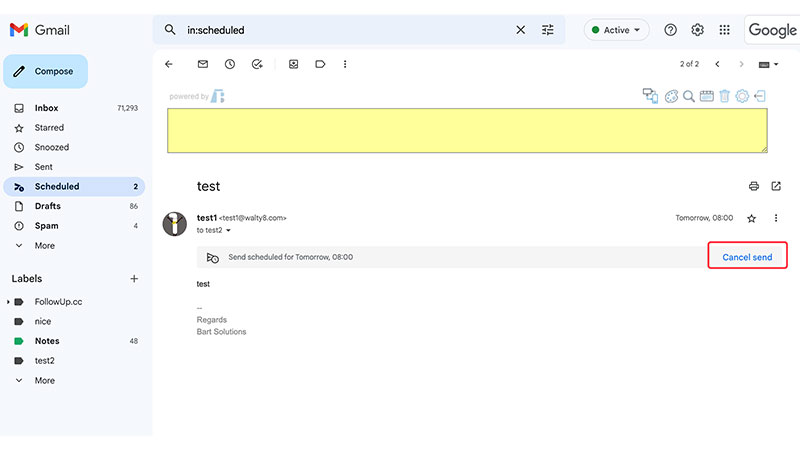
The email is ready, but it's too early to send now.
Step-by-step Instructions
Scheduling an email in Gmail is a useful feature for those who want to plan their communication in advance or for those who want to send emails to recipients in different time zones. It allows you to schedule an email to be sent at a later date and time of your choosing.

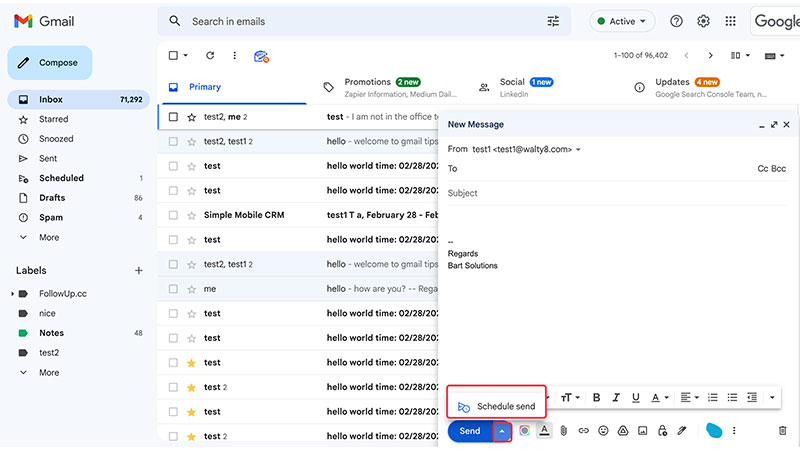
1. Compose your email as you normally would, including the subject line and recipient’s email address.
In the Gmail compose window, click the triangle near ‘Send’
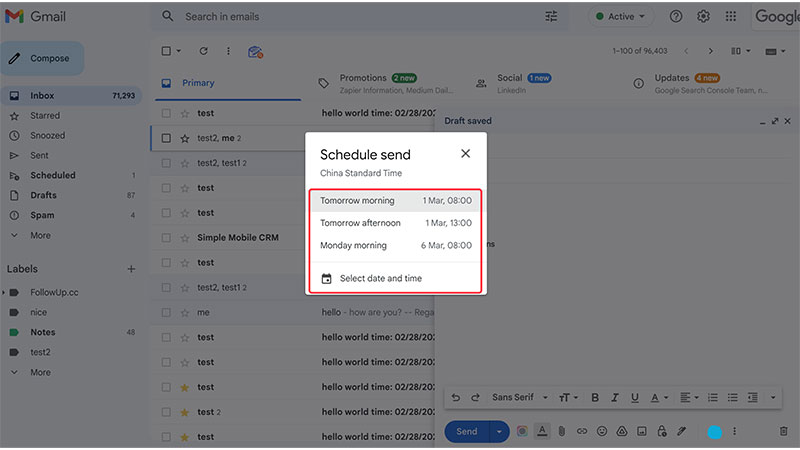
2. Choose the date and time you want the email to be sent by clicking on the calendar and using the drop-down menus to select the specific date and time.
Once you’ve selected the date and time, click on the “Schedule” button located at the bottom of the calendar.
Your email will now be scheduled to send at the date and time you selected.
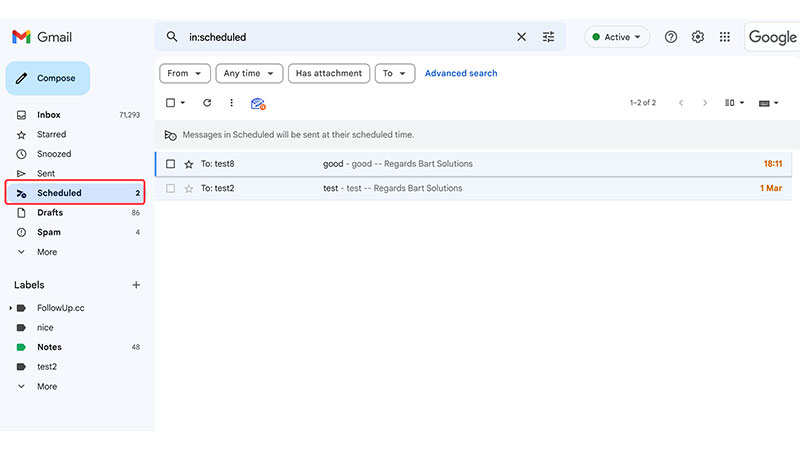
To view your scheduled emails, click on the “Scheduled” tab located at the top of the email window. This will show you a list of all the emails you have scheduled to send.
How can I look at scheduled emails in my Gmail?
1. Select “Scheduled” from the menu.
2. The reserved email list will be displayed in the inbox, sorted in reverse chronological order by date.
3. You can also access scheduled emails by using the search bar at the top of the page. Type “label:scheduled” into the search bar and hit enter.
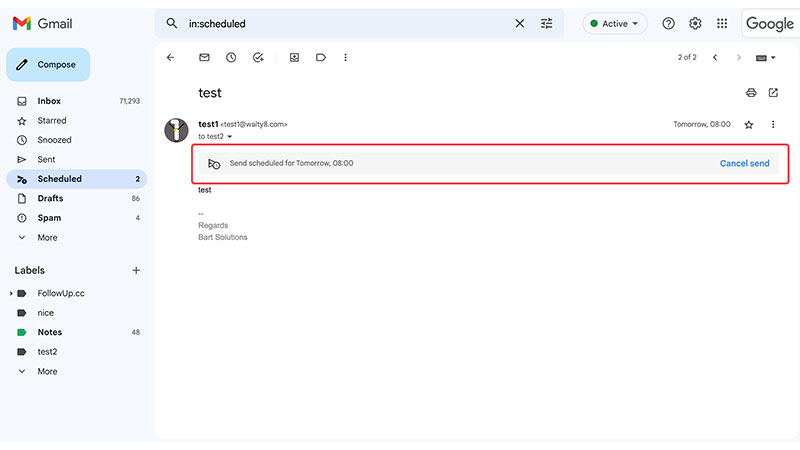
4. To view a specific scheduled email, click on it to open it in a new window.
5. To cancel or reschedule a scheduled email, hover over the email and click ‘Cancel Send’.
Demo Video (How to schedule an email in Gmail?)
Other Tips You May be Interested:
How to recall an email in gmail?
Reverse the send action, shortly after accidently clicked the ‘send’ button .